Introduction
SharpCap’s Polar Alignment feature debuted in version 2.9. Since then, amateur astrophotographers have flocked to it. This valuable feature can significantly improve astrophotography tracking and guiding precision.
How to fix SharpCap polar alignment?
Firstly, you must do plate solving the image to begin the alignment process. Once you click on Polar Alignment, SharpCap will attempt to plate to translate the vision. Rotate the axis in the opposite direction. Can’t you still fix the plate in the picture? Then try turning the mount a little bit more.
This is a teaser. I’ll go into more depth about each of these steps right now. So, read on to know everything on this matter!
How Does Polar Alignment Work?
Two photographs of the same place near the pole are analyzed to determine the polar alignment’s accuracy. You are using SharpCap to explore the first image and a 90-degree rotation of your telescope mount. Also, you can take a second image.
Identifying the stars in each image allows SharpCap to deduce the following.
- Plate Solving is used to identify the exact area of the sky in each photograph. SharpCap includes plate solving, which doesn’t require an internet connection or additional software or databases. SharpCap’s plate-solving algorithm only works within a 5-degree radius of the pole (N or S).
- This is where the stars appear to rotate as they go from one image to another.
SharpCap knows precisely where the telescope was pointed in each image to find the celestial pole. And how far the telescope is from the celestial equator.
It also knows where your RA axis is currently pointing, which is the point about which the stars appear to spin.
That means your polar alignment is correct if those two spots are identical. If they don’t match, you only have to tweak your mount’s Altitude and Azimuth adjusters. Do it until they do, and you’ve accomplished your polar alignment.
A real-time display of how far the mount must be moved in each direction. It is possible to confirm that SharpCap is perfectly aligned during this process. You can easily see.
Rectifying SharpCap for Refraction
When using polar alignment, you must ensure that SharpCap is configured to adjust for atmospheric refraction. SharpCap needs to know your location (lat/long) to correct for atmospheric refraction.
Alternatively, you can use SharpCap to retrieve this position from a Celestron AVX mount. Or you can manually enter it. However, make sure that your telescope doesn’t have any Celestron AVX mounting issues. Alternatively, you might use an internet-based Geolocation service to approximate it. Accuracy within one degree of longitude and latitude in longitude and latitude will suffice.
SharpCap considers the average refraction that occurs when the latitude of a location change. As the north-south speed drops to 25N/S, the arc length doubles to about 0.5 minutes.
No need to take into consideration temperature-dependent refraction shifts in polar alignment. It simply takes a change in temperature of 0.01 minutes of angle to alter the refraction at 50N.
Use refraction correction to observe the North (or South) celestial pole. Refracted light will appear darker, while light from its actual location will appear lighter. The amount of correction is also displayed in the first step panel information.
If you can’t rectify this, you may have problems with your SharpCap. In this case, you can try these polar alignments we’ve mentioned here. So, check them below-
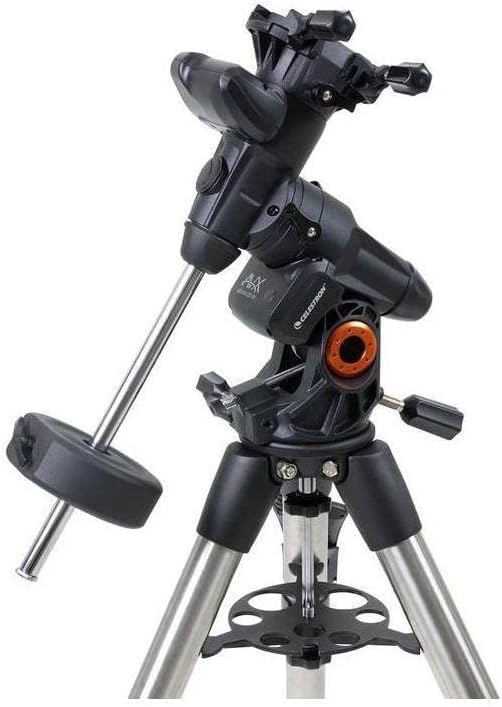
| Advanced VX Mount and Tripod | |
These are the most famous polar alignments on the market. Also, these are less expensive and from well-known brands.
3-Steps to Do the Alignment Process
After rectifying Sharpcap for refraction, you can quickly follow the step-by-step instructions. The process won’t bother you much.
But you must know how far you can see with a telescope to get some basic idea. Then it would be best if you had some tools and some extra things to follow for the procedure which we’ve included here-
Required Things
- An equatorial mount
- SharpCap supported camera
- 1-2.5 degrees camera’s field view
- Visible at least 15 stars in the FOV
- Alignment within 5 degrees of the pole (rough polar alignment)
Step-by-Step Instructions
You’re ready to take the next step when you’ve done everything above. Polar Alignment can be found in the “Tools” section of the program’s main menu.
Step-1: Do Plate Solving the Image
SharpCap may attempt to plate-solve the image captured by your guide camera. As soon as you click on Polar Alignment, Sharpcap will take care of the rest. SharpCap will convert the image captured by your camera.
The phenomenon will occur when you are close enough to the North Celestial Pole, and your range of view is large enough.
If you want to see at least 15 stars, you’ll need a long exposure with the GPCAM2. You’ve to set the shutter speed to 4 seconds. If your camera picks up heated pixels and mistakes them for stars, raise the Noise Reduction number. Try to do it in the Star Detection section.
Plate solving the image is done using the stars in the image represented by the yellow boxes. You’ll see the status change to “solved.” You can see if you successfully plate solve at least 15 stars in the picture.
Step-2: Rotate Axis in the Radial Direction
You can now press NEXT to move on to the next step. Do it when SharpCap has solved your first frame’s plates. Your telescope mount’s RA clutch should be unlocked and rotated around.
SharpCap will keep snapping frames. Also, it can attempt to plate-solve the new image as though nothing happened.
It validates that the image has been turned 90 degrees. It knows exactly where your camera mount is positioned to the camera. If everything is in order, SharpCap will show the NEXT button again. RA axis points can display even if they are not in your direct line of sight.
You can try turning the mount more if you still can’t fix the plate. Re-examine the settings if the camera is unable to capture enough stars.
Step-3: Adjust Altitude and Azimuth Bolts
You’ve reached the finish line. An arrow pointing to a nearby target region should be next to one of the image’s brighter stars. That should be highlighted in yellow.
The designated star can be moved into the target by adjusting the mount’s altitude and azimuth bolts. Because of this, your mount’s RA axis will align with NCP.
Under the Polar Align Error category, you’ll find some helpful signs for fine-tuning your alignment. The star will get closer to the target as you make modest modifications to the bolts.
Parallel lines that must be brought together will appear when you’re close enough to the destination.
FAQ’s
Question: What is the best place to aim a telescope?
Answer: Aim the main scope at a distance using the lowest-power eyepiece. Make sure the space is at least several hundred feet in the daytime. Using a telescope to peer at the Sun can result in permanent blindness. It’s best to find a spot up among the trees.
Question: Is polar alignment necessary for the telescope?
Answer: Polar alignment is the first stage in observing the night sky or photographing the stars. It’s essential to get it right. You can’t ignore it. A telescope mount’s axis can be aligned with the sky’s motion to track distant objects.
Question: What is the ideal polar alignment?
Answer: The better the item’s centered with good polar alignment, the better. Better alignment and less movement mean longer exposures can be achieved. It’s also essential to consider focal length. More mistakes are seen with an extended focal length than with a short one.
Conclusion
Now you’ve got a great preview of SharpCap’s polar alignment. It would be best if you were focused and always worried. Always use a guide camera while using the Sharpcap opposite alignment process.
You now have a thorough grasp of the topic. Please accept our heartfelt thanks for your stay.